When the new year hit, I knew I needed to declutter and re-organize my home. From being pregnant for 9 months and then being a new parent, I felt like my house was put on the back burner. Now, this was for all good reasons of course! But I knew it was time to tackle it, room by room. So I’m sharing below how I organized my bedroom, including our master bathroom and closet for the New Year!
Operation: Master Bathroom
I started the project in our Master Bathroom. It came to a point where it took me so much longer to get ready in the morning because I had no idea where I was putting things since they didn’t have a true “home”.
I found it was easier to start the decluttering process by doing drawer by drawer instead of all the drawers at once. This way it wouldn’t be too overwhelming and could easily be managed if I needed to stop in the middle. Below are the steps I took to organize my master bath!
- The first step is to buy storage products. Look at the spaces you plan on organizing and buy storage products that will fit that space. I went online (mostly Amazon and Target) and browsed through different storage trays/holders to find what worked best for our drawer space. I found that using acrylic drawer dividers like this and this one worked best to separate everything. I also bought these drawer grips to ensure all my storage trays stayed in place.
- After you have the storage products, completely empty your drawer and go through what you have. Look at expiration dates or use your judgment if you need to throw products away. If I haven’t used a product in 6 months +, then what will make the next 6 months any different? That’s when I know I need to get rid of it or give it to a friend/family member.
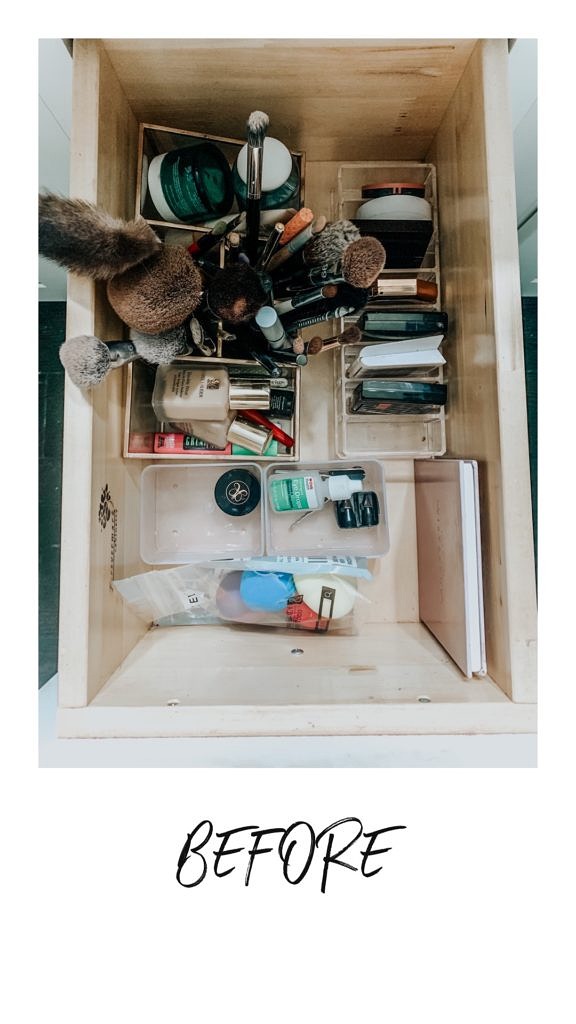
- Once it’s all cleaned out, look at the space you have and think of the best way to organize it that will work for you. Do you need to separate all your products by use? Do you want to separate it by category? In my makeup drawer, I bought storage containers to store my makeup by the product use. For example, I put all my mascaras together, my eye makeup brushes together, lipsticks together, etc. I knew for me, this would help me find things easier.
Showing some examples of how I organized my bathroom drawers below:
Makeup Drawer: Before & After
Hair Accessory Drawer

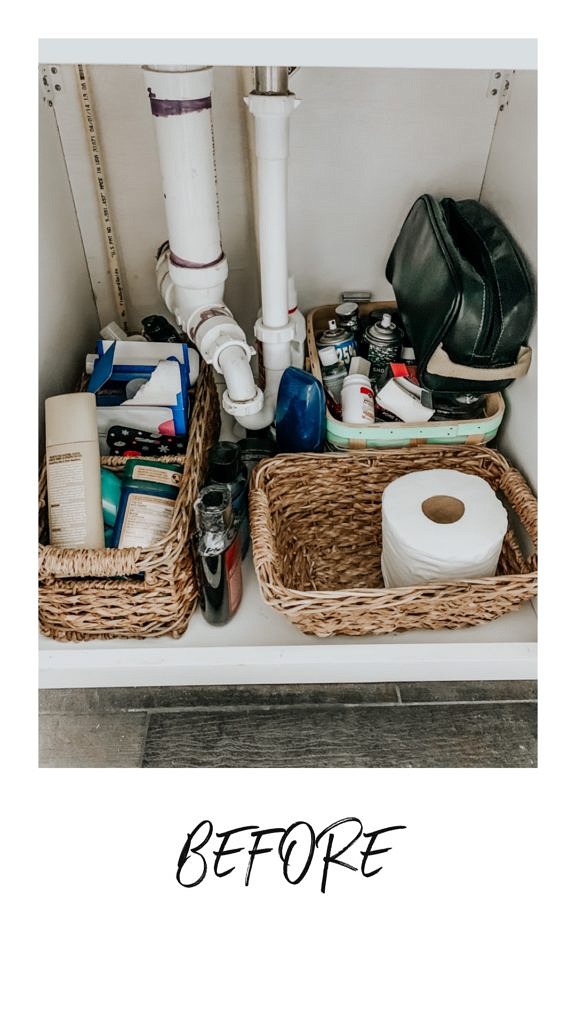
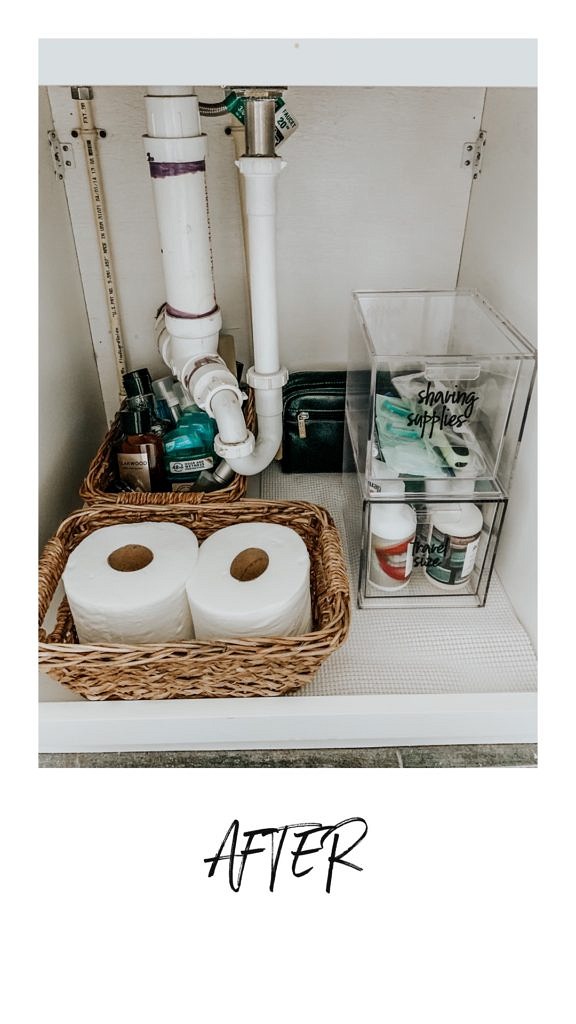
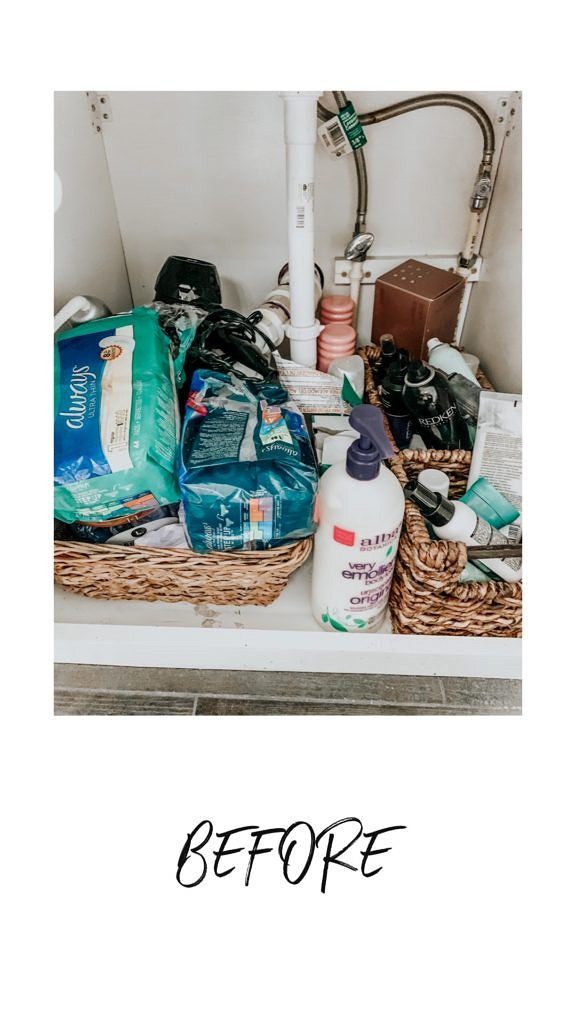
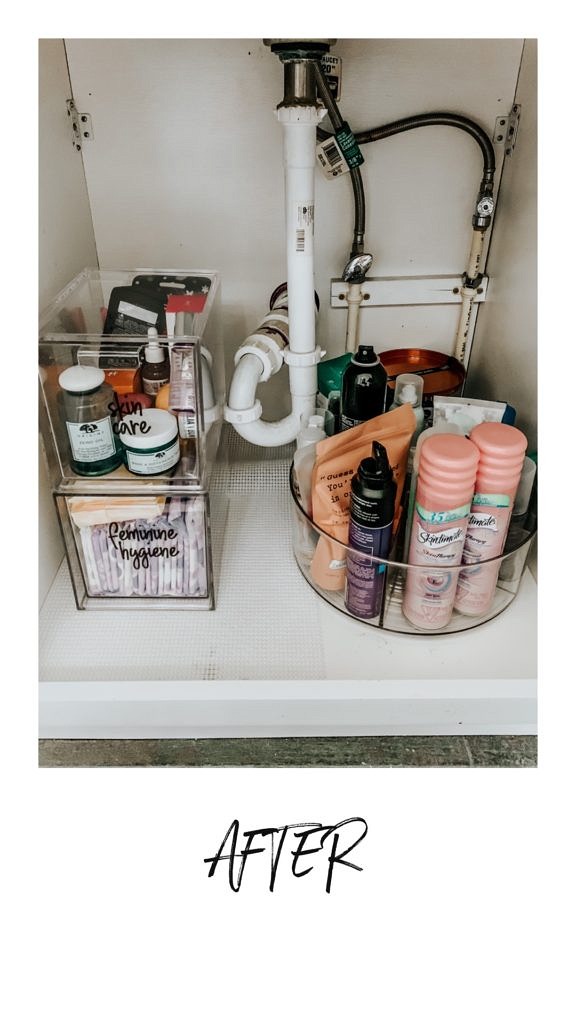
After I tackled the drawers, it was time to organize under the sinks. In my master bathroom, we have his and her sinks. The best way for us to organize this was to figure out ways we can organize all my husband and I’s products together for space purposes. We decided on buying these drawers and organized under the sink by product category. A big tip for organizing: using labels. We used these labels when grouping the products together so it would be easier to find. Another efficient way to organize products are by using a lazy susan and storage baskets. This acrylic lazy susan made daily items easy to reach and maximized our storage space. Showing some examples of how I organized under the sinks below.
Under Sink – Before & After
Operation: Dresser Drawers
Before I started on the dresser drawers, I made sure I had storage organizers to put in the drawers. I used these drawer dividers and these expandable ones to help separate my clothing items. Once I had all the supplies, I started to divide my clothing into 4 piles: “Keep”, “Store”, “Sell” and “Donate”. Similar to the bathroom, I organized each drawer by category: pajamas, underwear, socks, athleisure, etc. See below for the “after” examples of how I used the drawer dividers.

Operation: Closet

I feel like my closet is always the hardest and (longest) process of them all to organize. I am horrible at keeping up with it throughout the year and then find myself scrambling when it starts to get overwhelming. Sound familiar to any of you reading this right now? Well, that’s how I knew a closet cleanout needed to happen and happen fast! When starting the cleanout and organizing process, I follow the below steps to ensure I do it effectively and efficiently.
Step 1: Set up 4 piles/bins/bags to be able to throw your clothes and accessories in. I usually have 4 different piles and they are “Keep”, “Store”, “Sell” and “Donate”.
Step 2: Start to take down all of your clothes and accessories from the closet and separate them into the piles above. The items I usually decide to store are my off-season clothes. For example, if it’s summer I would store my bulky winter coats and sweaters. And for this year I packed away my maternity clothes to store until baby #2! I put all my “store” items in either these under bed storage bags or these plastic storage containers so I can easily find them when it’s time to wear them again.
Step 3: Organize! Once all your items are separated, start organizing the items you plan on keeping. This step can be so different for each person based on preference. Some people organize by color, by clothing category, by most used items, etc. so do whatever works for you.
Closet Organizing Tips/Products:
- Hangers: A huge tip when organizing is to use coordinating hangers. This will help your closet look more sleek and streamlined! I use these velvet hangers to ensure that my clothes don’t slip off. For my jeans/pants, I found that these hangers are the best because they make the bottoms stay in place. For skirt/shorts, I use these hangers with the clips, which helps you see what you have.
- Scarf Hanger
- Belt/Tie Hanger
- Belt/Tie Wall Mount
- Storage Baskets/Bins: I have storage baskets that I put on the top shelves of my closet to store additional items. For example, in one of my larger baskets, I store all of my “travel” accessories: weekender bags, packing cubes, neck pillows, luggage scale, etc. In another one, I store accessories: hats, beanies, scarves, gloves, etc.
- If you don’t want to store away your sweaters, I found that folding them helps save space since they are bulky!
- For me, I like when everything has a “home”. I bought this closet organizer to maximize our closet storage space. The shelves helped me have more space to organize and store additional items. Note: It has expandable hanging rods to be able to fit multiple closet sizes.
- Hook wall mounts for handbags: Having hooks to hang up my handbags saved me so much space! Plus it’s nice to be able to see what I have vs it being stored out of sight.
- Other closet storage items I used: Sunglasses holder, headband holder, jewelry case, bracelet holder, watch case (for him), and a watch case (for her).
- Shoe Rack
And that is a wrap for how I organized my bedroom for the New Year! This blog post was for sure a labor of love (sorry, I know it was crazy long) but I hope you all found it helpful! I know personally how stressful and daunting organizing any part of your house can be, so I wanted to create a guide to help. As always, please don’t hesitate to reach out if you have any questions!
Happy Organizing! xoxo
Shop bathroom organizers:
Shop dresser drawer organizers:
Shop closet organizers:

